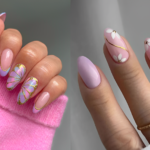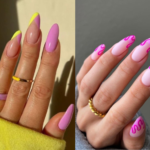
Getting acrylic nails done at home is easier than you might think! With the right tools, a bit of patience, and some practice, you can achieve salon-quality nails from the comfort of your home. Whether you’re aiming for a chic everyday look or bold statement nails, this guide will walk you through the steps to create stunning acrylic nails without stepping out the door. Let’s dive into the world of DIY acrylics and unleash your creativity!
What are Acrylic Nails?
Acrylic nails are artificial nail extensions made by combining an acrylic nails powder with a liquid monomer. The powder is typically a polymer that reacts with the monomer to create a hard, durable layer.
Benefits of Acrylic Nails
Acrylic nails provide added strength and durability, making them ideal for those with weak or brittle nails. They allow for versatile designs and can be customized to any length or shape. Additionally, they are long-lasting and can protect natural nails from damage.
Products Needed for DIY Acrylic Nails:
- Clear Acrylic Powder
- Colored Acrylic Powder
Make sure you choose a high-quality acrylic nail powder. High-quality powders are highly pigmented, offer even coverage, and have a consistent texture. The process of achieving acrylic nails will be easier with top-notch products.
- EMA Monomer
A monomer is a liquid that assists in converting the powder into a bead. Always choose an EMA monomer. Avoid monomers containing MMA or HEMA, as they can cause irritation and burning.
- Acrylic Brush (Size 14 or Size 12 if you are a beginner)
- Dehydrator
- Primer
- Nail Tips and Nail Glue (for extensions)
- Nail File
- Top Coat
Step-by-Step Guide to DIY Acrylic Nails:
Step 1: Prep Your Nails
Push your cuticles back with a cuticle pusher and clip away dead tissue with a cuticle clipper. For a detailed guide, check out our blog on how to get the perfect manicure.
Step 2: Glue the Nail Extension (if needed)
Choose a nail extension that fits your natural nail perfectly by ensuring it reaches from one sidewall to the other. Attach it just below the tip for a strong foundation. Clip and file the extension to your desired shape.
Step 3: Apply Dehydrator and Primer
Apply dehydrator to your natural nails. Once dry, apply primer to enhance adhesion.
Step 4: Apply Clear Acrylic Powder
The key to applying acrylic nail powder is the powder-to-liquid ratio. Dip the brush in monomer, drain excess liquid, and then dip it into the powder at a 45-degree angle. Wait for it to become glossy before applying.
Step 5: Apply Colored Acrylic Powder
Take a bead of the colored acrylic on the brush and apply it a hairline away from the cuticle. Spread it evenly for a smooth application.
Step 6: Apply Clear Acrylic Powder Again
For added strength and durability, apply a layer of clear acrylic powder over the colored layer. Check if the nails are dry by tapping them—a clicking sound indicates dryness.
Step 7: File and Finish
File your nails to sharpen the edges and polish the surface. Apply a top coat and cure under an LED lamp for 60 seconds.
Acrylic Nails vs. Gel Nails
When choosing between acrylic nails vs gel nails, consider your preferences for durability and flexibility. Acrylic nails offer a harder, more durable finish, while gel nails provide a flexible, natural feel.
Acrylic Nails Ideas and Designs
Explore endless acrylic nail ideas for inspiration! From minimalist nude tones to bold patterns and intricate designs, there’s a style for everyone. Whether you prefer short, chic nails or dramatic, long claws, unleash your creativity with unique acrylic nail designs.
With these simple steps, getting salon-quality acrylic nails at home is completely achievable. Remember, practice makes perfect. Even if your first attempt isn’t flawless, you’ll master the technique with time and create stunning looks effortlessly. Enjoy the process, and let your nails be a canvas for your imagination!


